
These real CanKun-produced woven-label samples show two different artwork layouts. The photographs provide a practical starting point for reviewing a main logo, secondary lettering and graphic accents before placing a custom label order.
Planning your order? Explore custom woven labels with logo, or request a woven label sample review. Send the current logo file, critical small text, intended visible size, fold and quantities by version. The photographed samples illustrate review tasks; your own construction and physical sample need approval.
The two sample layouts
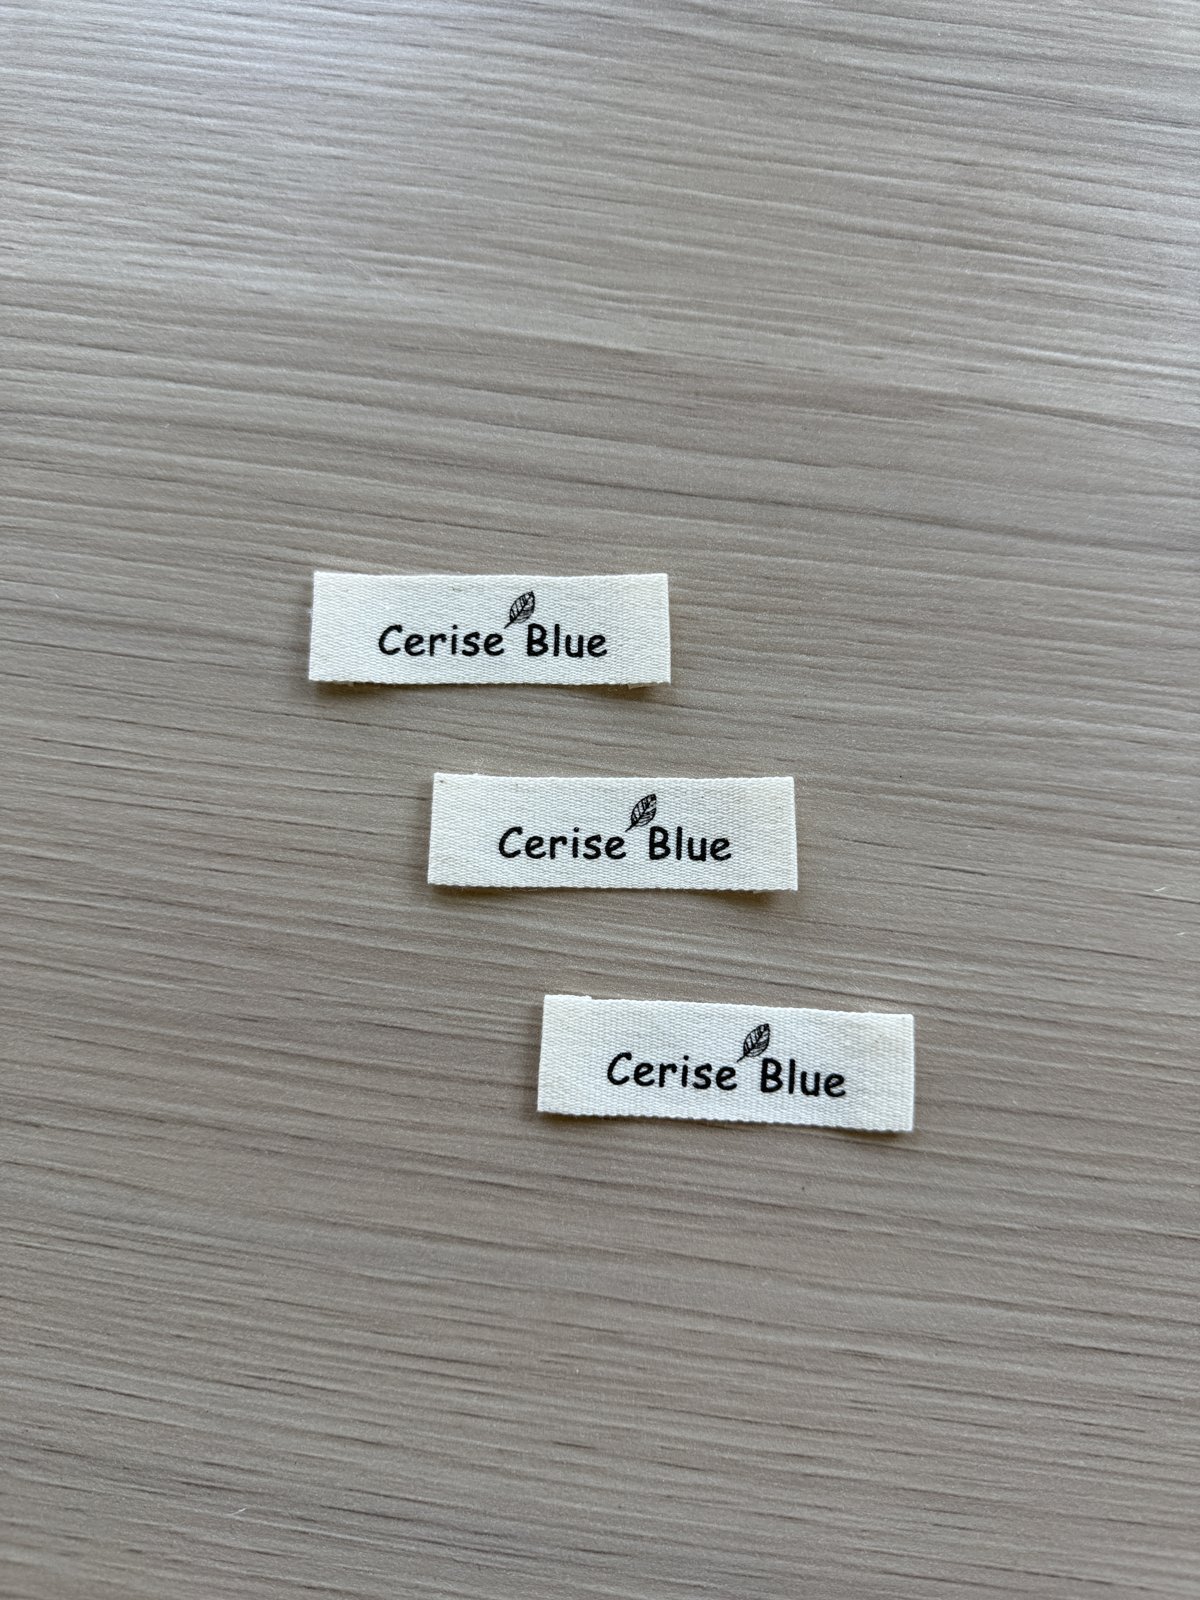

Sample A places dark lettering across a light, elongated background, with a small leaf detail above the word. Sample B combines a larger main mark with smaller lines of text and a flower detail on a light-blue background. Each photograph shows several finished samples, making the different elements easy to identify.
What this sample comparison shows
- Main lettering: review the shape, spacing and reading direction at the intended finished label size.
- Secondary text: check smaller lettering separately from the main mark. A readable main word does not establish that every smaller line will work in a different size.
- Graphic details: review the motif, its position and the separation between adjacent colours against the approved artwork.
- Label construction: specify the finished visible area, attachment position and sewing allowance for the garment or accessory.
Build an approval reference for your order
Send the artwork file and revision, intended application, dimensions and quantity for each version. Ask for a physical sample in the proposed construction. Record any changes to wording, colours, graphic position or sewing allowance before approving that version for bulk production.
The visible result here is the finished sample layout shown in the photographs. This sample case does not establish a customer order quantity, approval date, delivery outcome, fibre composition or tested wash performance. Confirm those requirements and supporting evidence for your own project.
Plan the next step
Compare the custom woven label range and review the custom woven label specification guide. For a reorder, use the artwork and SKU version checklist.
Discuss your woven-label sample requirements with your artwork, quantity and destination. CanKun’s published starting MOQ is 100 pieces, with sampling normally around 3 days after specification review. Confirm the final construction and schedule in the project quotation.
Sample description correction record
During our website review on 12 October 2026, we checked the sample captions against the original production photographs. The CeriseBlue sample had previously been described as having blue lettering; the corrected description identifies dark lettering on a light-coloured background. The revibe sample had previously been described as having a white background; the corrected description identifies a light-blue background with dark lettering, smaller text and a flower accent.
The photographs themselves are unchanged. The updated descriptions now appear in the image text, the woven-label category and the custom woven-label product page. These are customer-customized display samples. The materials, weights, folds and processes listed on our website are available for custom production; the exact construction and dimensions are selected and approved for each order.
This record documents a website sample-description correction. It does not describe a defective customer batch, a delivery result or a performance test.
Record the artwork, fold and stitching zones together
The CeriseBlue photograph is useful for comparing the main word, the leaf and the space between them. The revibe photograph gives you a second review task: compare the main mark with the smaller lettering and the separate flower. Identify which element must remain readable before choosing a smaller finished label.
When you prepare a new order, mark the intended visible face and stitching edges on your own drawing. State whether the width and height describe the flat label or the visible area after folding. For an end-fold or centre-fold request, identify the fold lines and any area that will be hidden in the garment seam. Confirm the actual construction and allowance on the physical sample; the photographed lettering layouts do not supply a universal fold template.
| Review item | Record for your order | Check on the sample |
|---|---|---|
| Main word and motif | Artwork filename, revision and critical design elements | Shapes, spacing, colours and reading direction at the intended size |
| Smaller lettering | The exact approved wording and any permitted simplification | Each small line separately, including its position beside the main mark |
| Fold and stitching zones | Visible size, flat size, fold lines and the intended sewing edges | Artwork position after the sample is placed at the intended garment location |
| Mixed versions | Quantity and destination for each artwork version | Version identification against the approved file and physical reference |
Keep changes in one approval record
If wording, size or the attachment position changes, identify the changed version and compare it again with the proposed sample. Keep the approved artwork file and physical reference together for later repeat orders. Do not assume an old photograph proves that a new size, fold or performance requirement has already been approved.
Download the editable woven-label specification worksheet (.txt), save a copy and complete one record per design. Copy the known details into your quote request; mark any undecided construction as “not sure”. Downloading the file does not submit a request.
Sample reference and evidence
The original CeriseBlue photograph has a file-metadata date of 7 May 2026. It shows three light-coloured samples with dark lettering and a leaf motif. That date identifies the photograph reference, not an order or manufacturing date. The photograph supports the visible layout comparison; yarn composition, finished dimensions, wash performance and customer delivery results require their own records.
Two woven label examples, two artwork review paths
For the CeriseBlue layout, identify the main lettering and the leaf as separate approval details. For the revibe layout, add a separate review of each smaller text line and the flower. This gives the buyer a clear set of checks before deciding the finished size of custom woven labels with logo artwork.
- Identify critical content: mark which words and graphic details must remain visible on the intended product.
- Overlay the proposed construction: on your own dimensioned drawing, show fold lines and stitching zones relative to those details.
- Review the actual-size sample: compare each marked detail with the approved artwork at the intended placement, rather than judging an enlarged photograph.
- Resolve changes: if the proposed size hides or compresses a detail, agree the revised artwork or construction and record the new approval.
The visible result is a pair of different lettering layouts in real photographed samples. No fixed dimensions or fold measurement is inferred from either image. Use the woven label size and fold approval record to define your own construction, then request a sample review with the proposed drawing and quantity.
REFERENCE SPECIFICATION · 参考规格
Reference specification for a new sample
These are proposed values for a NEW sample. They are not measurements of the photographs, a recovered order, a signed production sample or a test result.
Existing evidence and its limits
The published own-produced samples show dark main lettering with a leaf motif on a light ground, and a second layout with smaller text and a flower. The CeriseBlue photograph metadata date is 7 May 2026; the photographs establish appearance, not dimensions or yarn composition.
Construction and dimensions
Reference option: 50D polyester fine Damask, non-metallic polyester colour yarns; visible face 60 × 20 mm, 7 mm end fold at each short side, flat cut size 74 × 20 mm. Colours and this construction are new design choices.
Artwork and attachment
Start with text 2.5 mm high and strokes 0.4 mm, with artwork 5 mm inside the visible edges. Trial stitch placement 2 mm inside each visible short edge. Confirm lettering, folds, edges and attachment on the physical garment sample.
Size and quantity reference for a coordinated order
For standalone woven or printed size labels, a planning example is XS/S/M/L/XL at 100 pieces per size: 500 pieces, packed 50 pieces per bag and separated by size. For a two-card hang-tag set, use the separate set-based example in the size guide. The unit, artwork version and actual garment-size mapping must be stated for each component.
Review the category reference option · Download the reference specification (TXT) · Size allocation and packing example
Record the final drawing, artwork revision, component quantities, actual physical sample and approval before bulk production. Garment composition/care content, performance results and approver/date must come from the actual project.
Planning a Canadian-destination order? Use the Canadian specification review and physical-sample approval checklist, then include flat and visible dimensions, fold/seam allowances and logo artwork revision in your woven-label quote request. Identify Canada as the destination and keep the approved content, drawing and sample revision together.